
How to choose your plants?
All of our products work on 100-240v. This includes the tabletop units, Click & Grow 25, and Wall Farms as well.
The energy usage of our Smart Garden lamps is as follows:
HS02 17 Pods Hydroponics System:
Grow Light:102 28W LED Grow Lights
HS05 16 Pods Hydroponics System:
Grow Light:125 28W LED Grow Lights
HS04 90 Pods Hydroponics System:
Grow Light:6 12W LED Grow Lights
HS07 90 Pods Hydroponics System:
Grow Light:3 16W LED Grow Lights
HS08 120 Pods Hydroponics System:
Grow Light:4 16W LED Grow Lights
HS06 60 Pods Hydroponics System:
Grow Light:2 16W LED Grow Lights
What kind of lights does Growell use?
Our gardens use LED light bulbs that are very long-lasting - if used every day, the bulb should last for 7 years.
The Hydroponics Growing System have two types of bulbs - white and red LEDs. The red light spectrum will make the photosynthesis process more efficient, resulting in better growth and healthier plants.
The lamp can be pretty bright, but please avoid covering the garden to prevent overheating or causing a fire hazard. As all of our Smart Gardens use LEDs, you don’t need to worry about the lamp emitting any UV rays either so covering is definitely not needed.
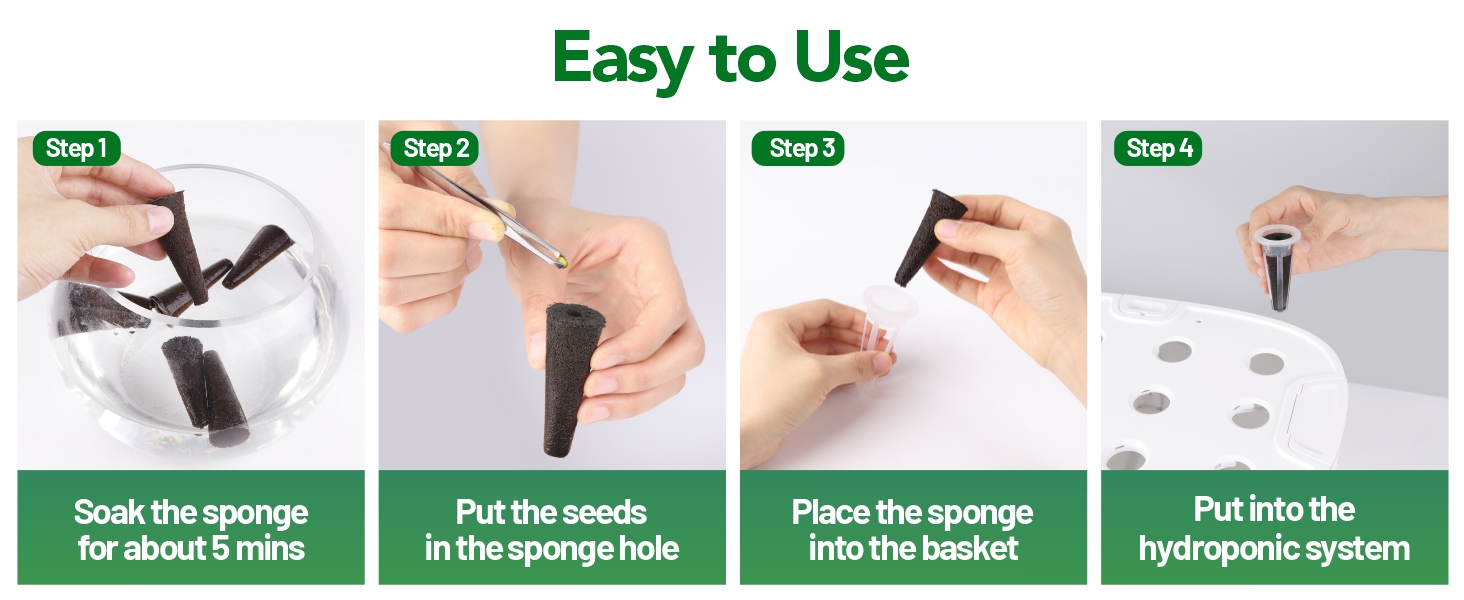
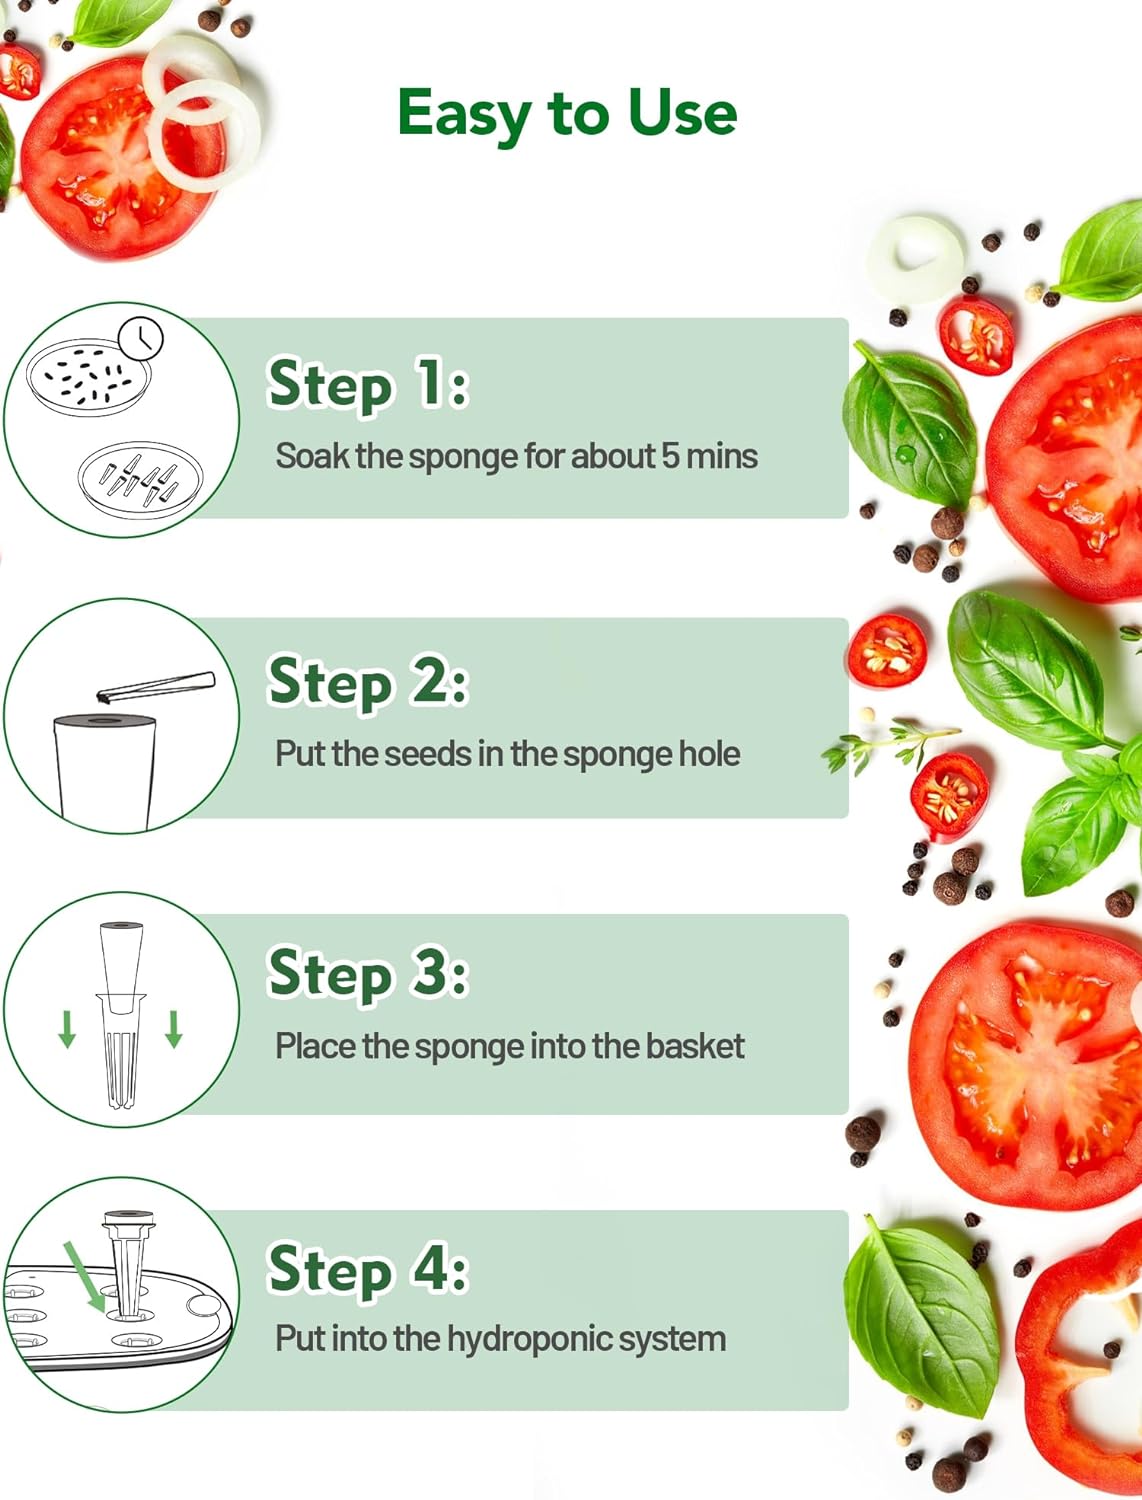
How to use the plant pods
Some years ago, we switched to a new, more sustainable plant pod concept for our indoor gardens and farms that would create less plastic waste and be more environmentally friendly.
When inserting the plant pods into their plastic cups, please make sure they are not upside down - the tapered end of the pod should always remain on the bottom.
How fast do seeds germinate?
Germination speed mainly depends on the temperature of your room. The warmer the environment, the faster the germination. The best average temperature to grow your plants is 18 to 24 °C (64 to 75 °F).
Usually, it takes around 1 to 2 weeks to germinate. Some plants (for instance mini tomato, chili pepper and rosemary) may take up to 3 weeks. All lettuce and kale plants are very sensitive to high temperatures (above 24 °C / 75 °F) so their germination might be inhibited by that.
You will find the most precise details from your plant pod package as well as from our guide here.
Please make sure you keep the transparent germination domes on the pods until the sprouts reach them.
With the Smart Gardens, most of the heavy lifting will be done by the technology developed by us! Your plants will get everything they need from our LED lights, watering system and of course the Smart Soil.
You can just set it up and watch the magic happen!
The Smart Soil creates the perfect environment plants need to thrive. It releases nutrients in sync with the plant's life cycle, keeps the soil's pH balanced, and employs tiny oxygen pockets to guarantee that plants get ample breathing room and nutrients even when the soil is wet.
This way the germination process is sped up and you'll find yourself growing your own herbs, salads and fruits in no time at all. Soon you'll be growing tomatoes in the winter and wondering how you got by without them before!
If your plants have not sprouted after 3-4 weeks or you have questions about your Smart Garden, then make sure to get in touch with our support with some photos of your plant pods and Smart Garden and they will be able to help you out.
LEARN MORE ABOUT Hydroponics Growing System Kit HS02
LEARN MORE ABOUT Hydroponics Growing System Kit HS05
What is the life cycle of plants in the Smart Garden?
All the plants have a definite life cycle - due to the limited space and possible amount of nutrients per each soil pod, no plant will be able to reproduce indefinitely. Some plants can be repotted if a longer life cycle is desired. What is more, a large part of edible plants are annual, meaning they are able to yield one harvest. While some herbs do last longer than salad greens, for instance, each pod will reach the end of its life cycle sooner or later, as the soil pod can only contain so many nutrients and space for the roots to grow.
Some general insight on the average life cycles is illustrated below:
Find out about the life cycle and correct harvesting methods of each plant here:
Plant Care Tips
A rule of thumb is that once a plant has been fully harvested, it will not be able to regrow and it should be replaced with a new pod. Happy growing!
Does temperature matter?
Does temperature matter?
For some plant pods, a precise temperature range is more essential than others for germination and yielding. Due to heat sensitivity, there are some limitations when growing plant pods successfully in warm climates or during a hot summer. Here is a great guide on how to choose plants that suit your indoor conditions best:
How to choose your plants?
It is vital to keep indoor conditions in mind because the outdoor climate does not usually reflect the actual conditions indoors, especially when the air conditioner is in use. So, if you live in a very warm and humid climate, but have the option to use AC at all times to maintain the specified temperature range, there is no reason to hesitate to grow heat-sensitive plants.
The recommended average room temperature suitable for all plant pods is 22 °C (72 °F). If the room temperature is below 18 °C (64 °F), please keep in mind that most seeds might not germinate or will grow much slower than usual.
To grow salad greens successfully, the room temperature should range from 18 °C (65 °F) to 24 °C (75 °F). Most salad greens are heat-sensitive and have the highest germination rate and highest yield at that temperature range. Also, high temperature induces bolting that in turn may change the taste to bitter and hold the plant back from growing new edible leaves.
Here is a list of plants that are heat-sensitive:
Herbs and greens: Arugula, Bloody Sorrel, Garden Cress, Green Kale, Green Lettuce, Green Sorrel, Italian Kale, Leaf Mustard, Leaf Radish, Oakleaf Lettuce, Pak Choi, Red Frill Mustard, Red Kale, Red Lettuce, Red Pak Choi, Red Romaine Lettuce, Romaine Lettuce, Wasabi Mustard, Mizuna, Red Oakleaf Lettuce.
Decorative plants: Busy Lizzie, Cornflower, Moss Rose, Ornamental Grass, Sweet Alyssum.
Fruiting plants: Dwarf Pea.
If the plant pod is not mentioned in the list above, it is not as heat-sensitive.
Many herbs on the other hand, benefit from warmer temperatures, even if it is raised up to 30 °C (but not above that). Fruiting plants, such as peppers, chilies, and tomatoes benefit from warmth, which promotes faster germination and growth.
How to store the plant pods?
The pods can be stored for about one year after purchase when kept in dark and dry conditions at a normal room temperature (up to 26 °C / 78 °F) - this also applies for packs that have already been opened. Therefore, feel free to stock up on different plants for long-term use!
After the recommended period, the pods may begin to lose their best qualities, and sprouting may be hindered.
If the room temperature rises higher than 26 °C / 78 °F (especially in warmer climates or during a hot summer), the plant pods should be stored in the refrigerator (freezing is not needed). In this case, ensure that the refrigerator is not too humid (no visible water droplets) and the pods are placed in an airtight container.
In case you are worried that the overall room temperature is too warm to store the plant pods, we recommend stocking up less at a time.
What is the smart soil made of?
We're fans of pure food and non-GMO plants and haven't put anything in our products that is even remotely suspicious.
There are no pesticides, fungicides, insecticides, plant hormones, or any other suspicious substances in our products. And there's no need for them - a well-watered and well-fed plant with perfect growing conditions can defend itself without any outside help.
Our smart soil consists of a patented material comprising natural coco-coir and peat with added plant nutrients (N, P, K, Mg, Ca and microelements) required for plant growth. The nutrients come in the form of slow-release nutrient balls that are red, green, or beige in colour.
Although the mineral salts we use are chemically the same as in all organic fertilizers, in most countries it cannot be certified as "organic".
Also, our products are BPA-free!
Edible flowers
Have you ever wondered if you could use some flowers in your dishes to add some color?
We're happy to let you all know that most of them are edible!
Enjoy in salads or dishes! Edible flowers are calendula, cornflower, cockscomb, busy lizzie, lavender, moss rose, white snapdragon, sweet alyssum, red pansy and black pansy.
Growell plants and pets
Pets love variety. In addition to their regular food, an indoor garden gives you the chance to grow nutritious treats for your pets. Your pets deserve the best - our products contain no additives whatsoever.
Greens that dogs can eat in moderation include peas and kale. Cats enjoy catnip and can also eat lettuce. If you have a rabbit, Romaine lettuce and pak choi are tasty options. Also, hamsters would love to get some lettuce bites from time to time. Every pet is unique, though, and some have sensitive digestive systems. Make sure you are not giving your pet too many fresh greens as it might not be good for them. If you are unsure about whether your pet can eat a certain green, always check with a qualified veterinarian!
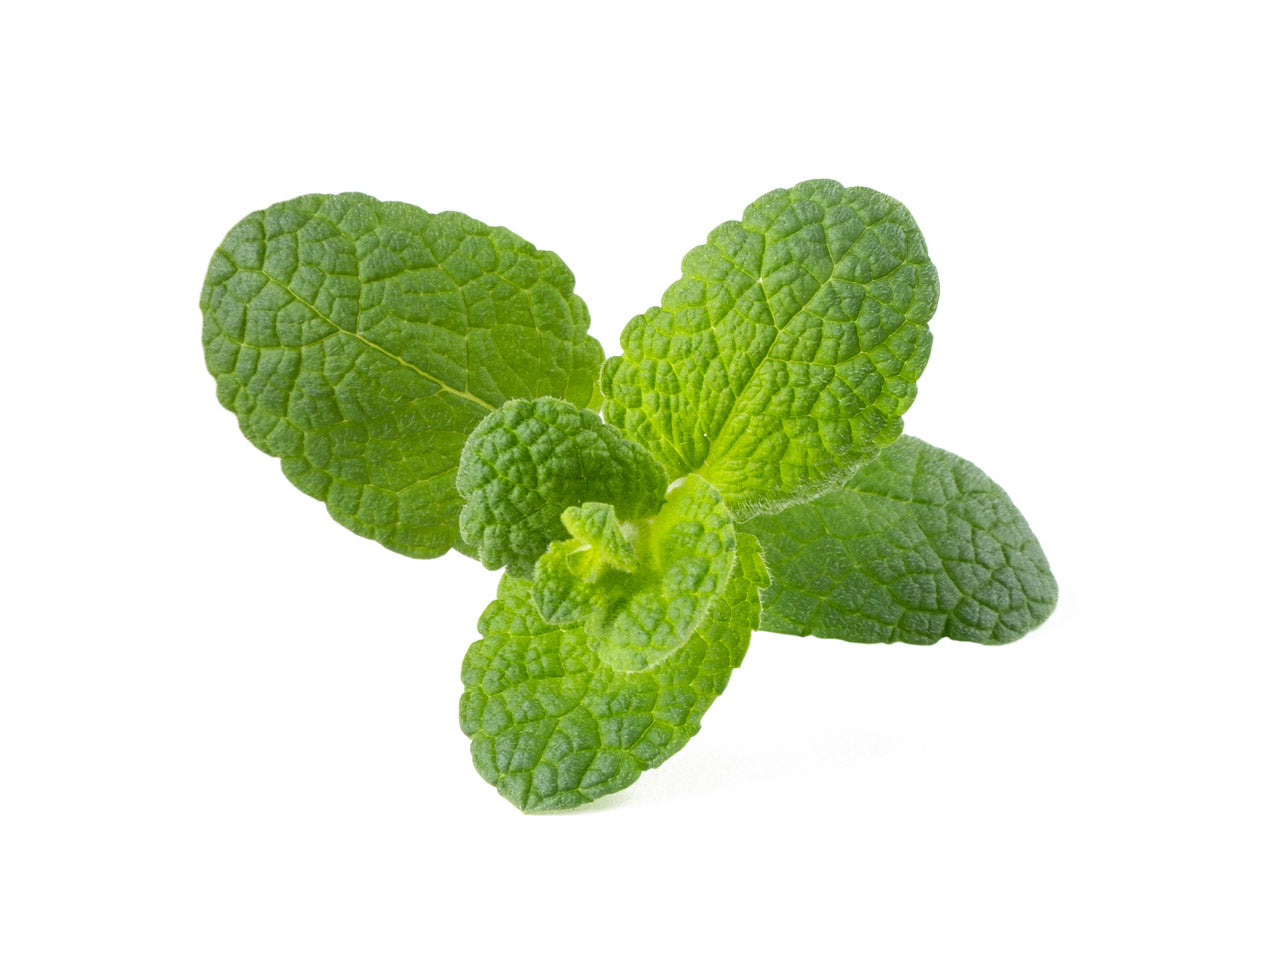
Apple Mint
Mentha suaveolens
Apple mint is a lovely, aromatic mint plant that has many fantastic culinary, medicinal and decorative properties. Like many other varieties in the mint family, it is rich in essential oils that have antiseptic properties.
The delicate flavour of apple mint works best in fresh, uncooked preparations. Add to cocktails, mocktails and tea. Add whole or chopped leaves to popsicles, sorbets and ice cubes. Use to make sauces or herb rubs for poultry, lamb and seafood. Roughly chop Apple mint and add to chutney, dressings, jelly or brine when pickling. Apple mint is great for drying and this way you can save it for later to avoid any waste.
Sprouts within: 7-14 days
Harvest in: 35 - 84 days
Temperatures: 18 - 30 °C / 64 - 86 °F
- Apple mint is not heat-sensitive and grows best at 18 - 30 °C / 64 - 86 °F.
- Apple mint seedlings are super tiny. Once they get going, they quickly produce a lot of stems and provide multiple yields.
- In approximately one month it should be ready for its first harvesting. Continue harvesting by cutting off the stems until the pod is about 12 weeks old.
- It grows best with one lamp arm. So, as soon as it starts reaching the lamp, cut the stem back strongly. Cutting also encourages new growth, which means more produce for you to enjoy!
- Apple mint can easily be replanted in a larger pot or in an outdoor flowerbed once the plants have used up all of the nutrients in the pod. Moreover, the nectar-rich flowers are not just decorative, they also feed bees and other wild insects.
Arugula
Eruca sativa
Arugula is an aromatic, peppery-flavored salad green. Also known as rocket, roquette, rugula and rucola, this green is extremely popular in Italian cuisine. It also happens to be super healthy! Many studies have suggested that consuming plant foods like arugula can decrease the risk of obesity, diabetes and heart disease while promoting a healthy complexion and weight loss.
Sprouts within: 7-14 days
Harvest in: 35 - 42 days
Temperatures: 18 - 24 °C / 64 - 75 °F
- Arugula is a heat-sensitive plant that germinates faster and produces more growth if grown at 18 - 24 °C / 64 - 75 °F.
- If Arugula is grown at warmer temperatures than 24 °C / 75 °F, the plant tends to bolt - it will grow a flower stalk. The leaves will gain more meaty texture and taste is even more bitter than usual. Also, clean white spots may appear on the leaves (that reduces its visual appearance). If plants are grown at higher temperatures than recommended, they will run to seed (flower) and will not produce edible leaves.
- Arugula is a natural source of vitamins A, C, K, calcium, folate, potassium, magnesium and iron.
- It might seem that it is a bit slow to start once it has germinated, but don’t worry, it will accelerate soon.
- Arugula is an annual plant and has the best nutritional value 25 to 35 days after planting the pod.
- If your Arugula bolts and produces little white flowers, you can use these to garnish your dishes. But don't expect it to produce more edible leaves after that - the plant is done after bolting.
- As the plant matures, the leaves develop a stronger and more pungent taste every day. If you prefer a somewhat milder taste, harvest it soon.
There are 2 ways to go about harvesting.
- Harvesting option 1. We recommend to harvest the whole plant 30 to 35 days from planting. It allows you to plant new pods ASAP.
- Harvesting option 2. Start harvesting (ca 25 days or 3 weeks after planting) by picking off the larger outer leaves - the plant will produce more from its basal growing point. Harvest gradually until the plant is about 35 days old. By harvesting like this, your plant may bolt. It means it grows a flower stalk and will have little white flowers.
Black Pansy
Viola cornuta
Did you know the name 'pansy' is derived from the French word 'pensée', meaning 'thought'? It's no wonder we keep thinking of these gorgeous flowers. They've been a source of inspiration for many artists over the years, including Georgia O'Keeffe who produced a stunning painting of a Black Pansy in 1926. Grow Black Pansies in your Smart Garden and bring some artistic vibes to your living space!
Sprouts within: 7-14 days
Lasts up to: 84 days
Temperatures: 18 - 26 °C / 64 - 79 °F
- Black Pansy is a heat-sensitive plant and grows best at 18 - 26 °C / 64 - 79 °F. Germination and growth are inhibited if the average temperature reaches 30 °C / 86 °F.
- Pansy may seem a bit slow at the beginning but once it gets going it will grow a lot of leaves and flower stems fast.
- Expect to see the first flowers approximately 50 days after planting.
- Use the little black flowers to garnish your dishes.
- Black Pansy generally requires very little care - just remove withered flowers to promote the growth of new ones.
- Black Pansy grows best if the lamp has just one arm! If the lamp is set too low it may burn your thriving plants. If the lamp is set too high your plants won't get enough light and may grow leggy.
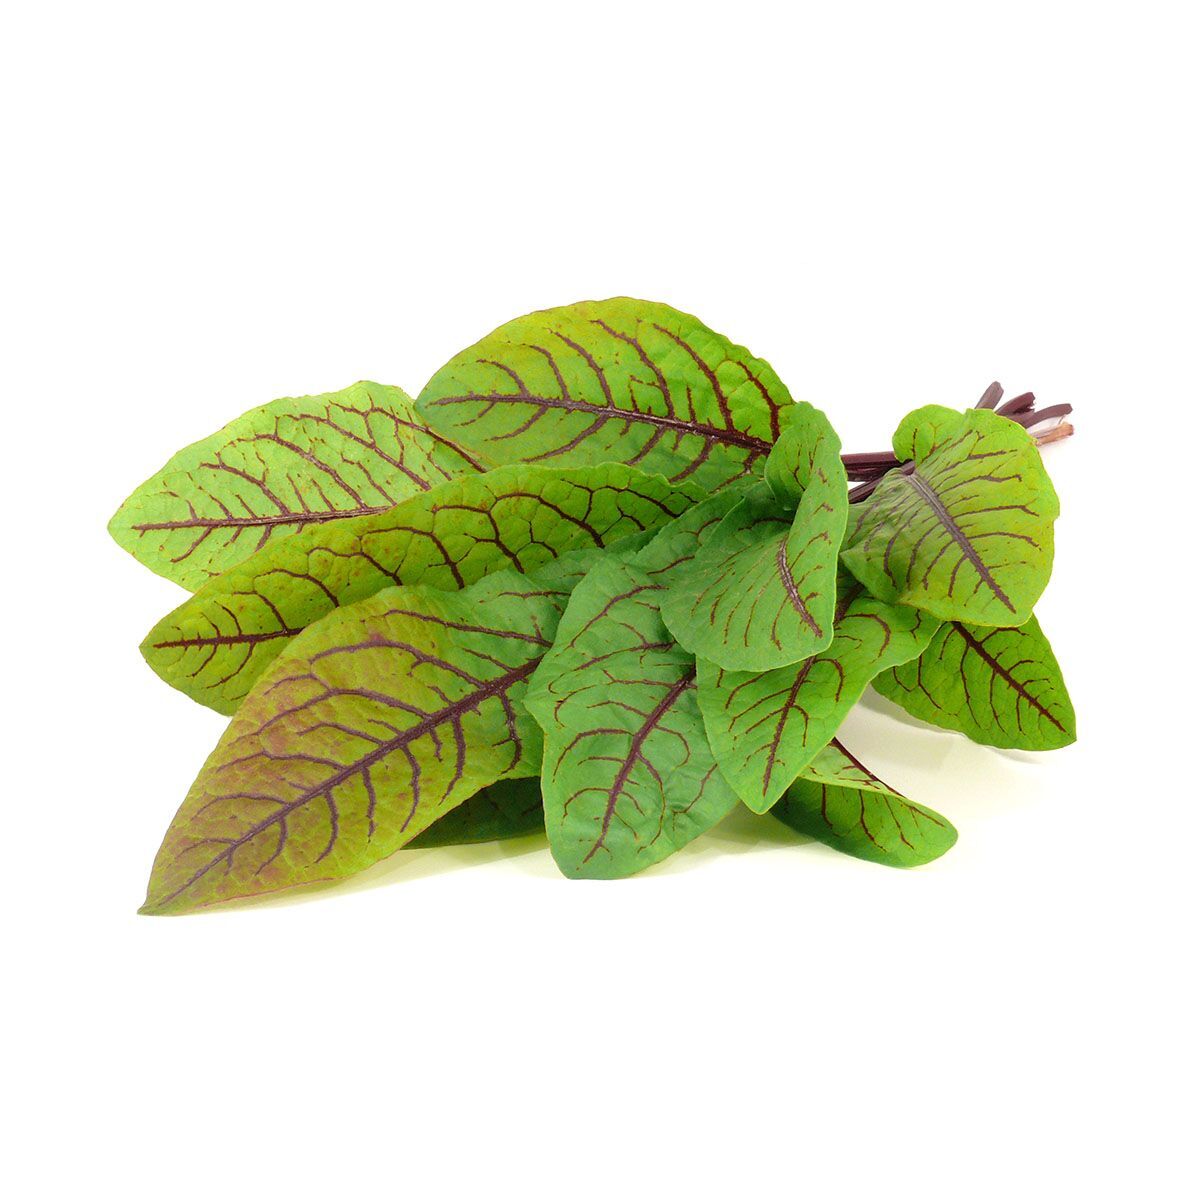
Bloody Sorrel
Rumex sanguineus
Bloody Sorrel (also known as Red Sorrel) really packs in the possibility. A beloved warm climate alternate to cranberries, sorrel’s young leaves, and flowers are edible. Have sorrel on hand to liven up your living quarters or next culinary adventure.
Sprouts in: 1 - 2 weeks
Harvest in: 4 - 8 weeks
- Bloody Sorrel is heat sensitive and grows best at 18 - 24 °C / 64 - 75 °F. If the temperature is higher than 24 °C / 75 °F, then germination is inhibited.
- You may start harvesting single leaves in about three weeks after planting or harvest the whole plant after one month of growing - it is up to you.
- Harvest all Bloody Sorrel before two months of age (before 40 days), only then has the best taste and the highest nutritional value.
- If Bloody Sorrel ages more than two months it may lose its signature sour flavor.
- Attention! The plant is entirely red and the red-colored juice may stain your skin and clothing while harvesting.
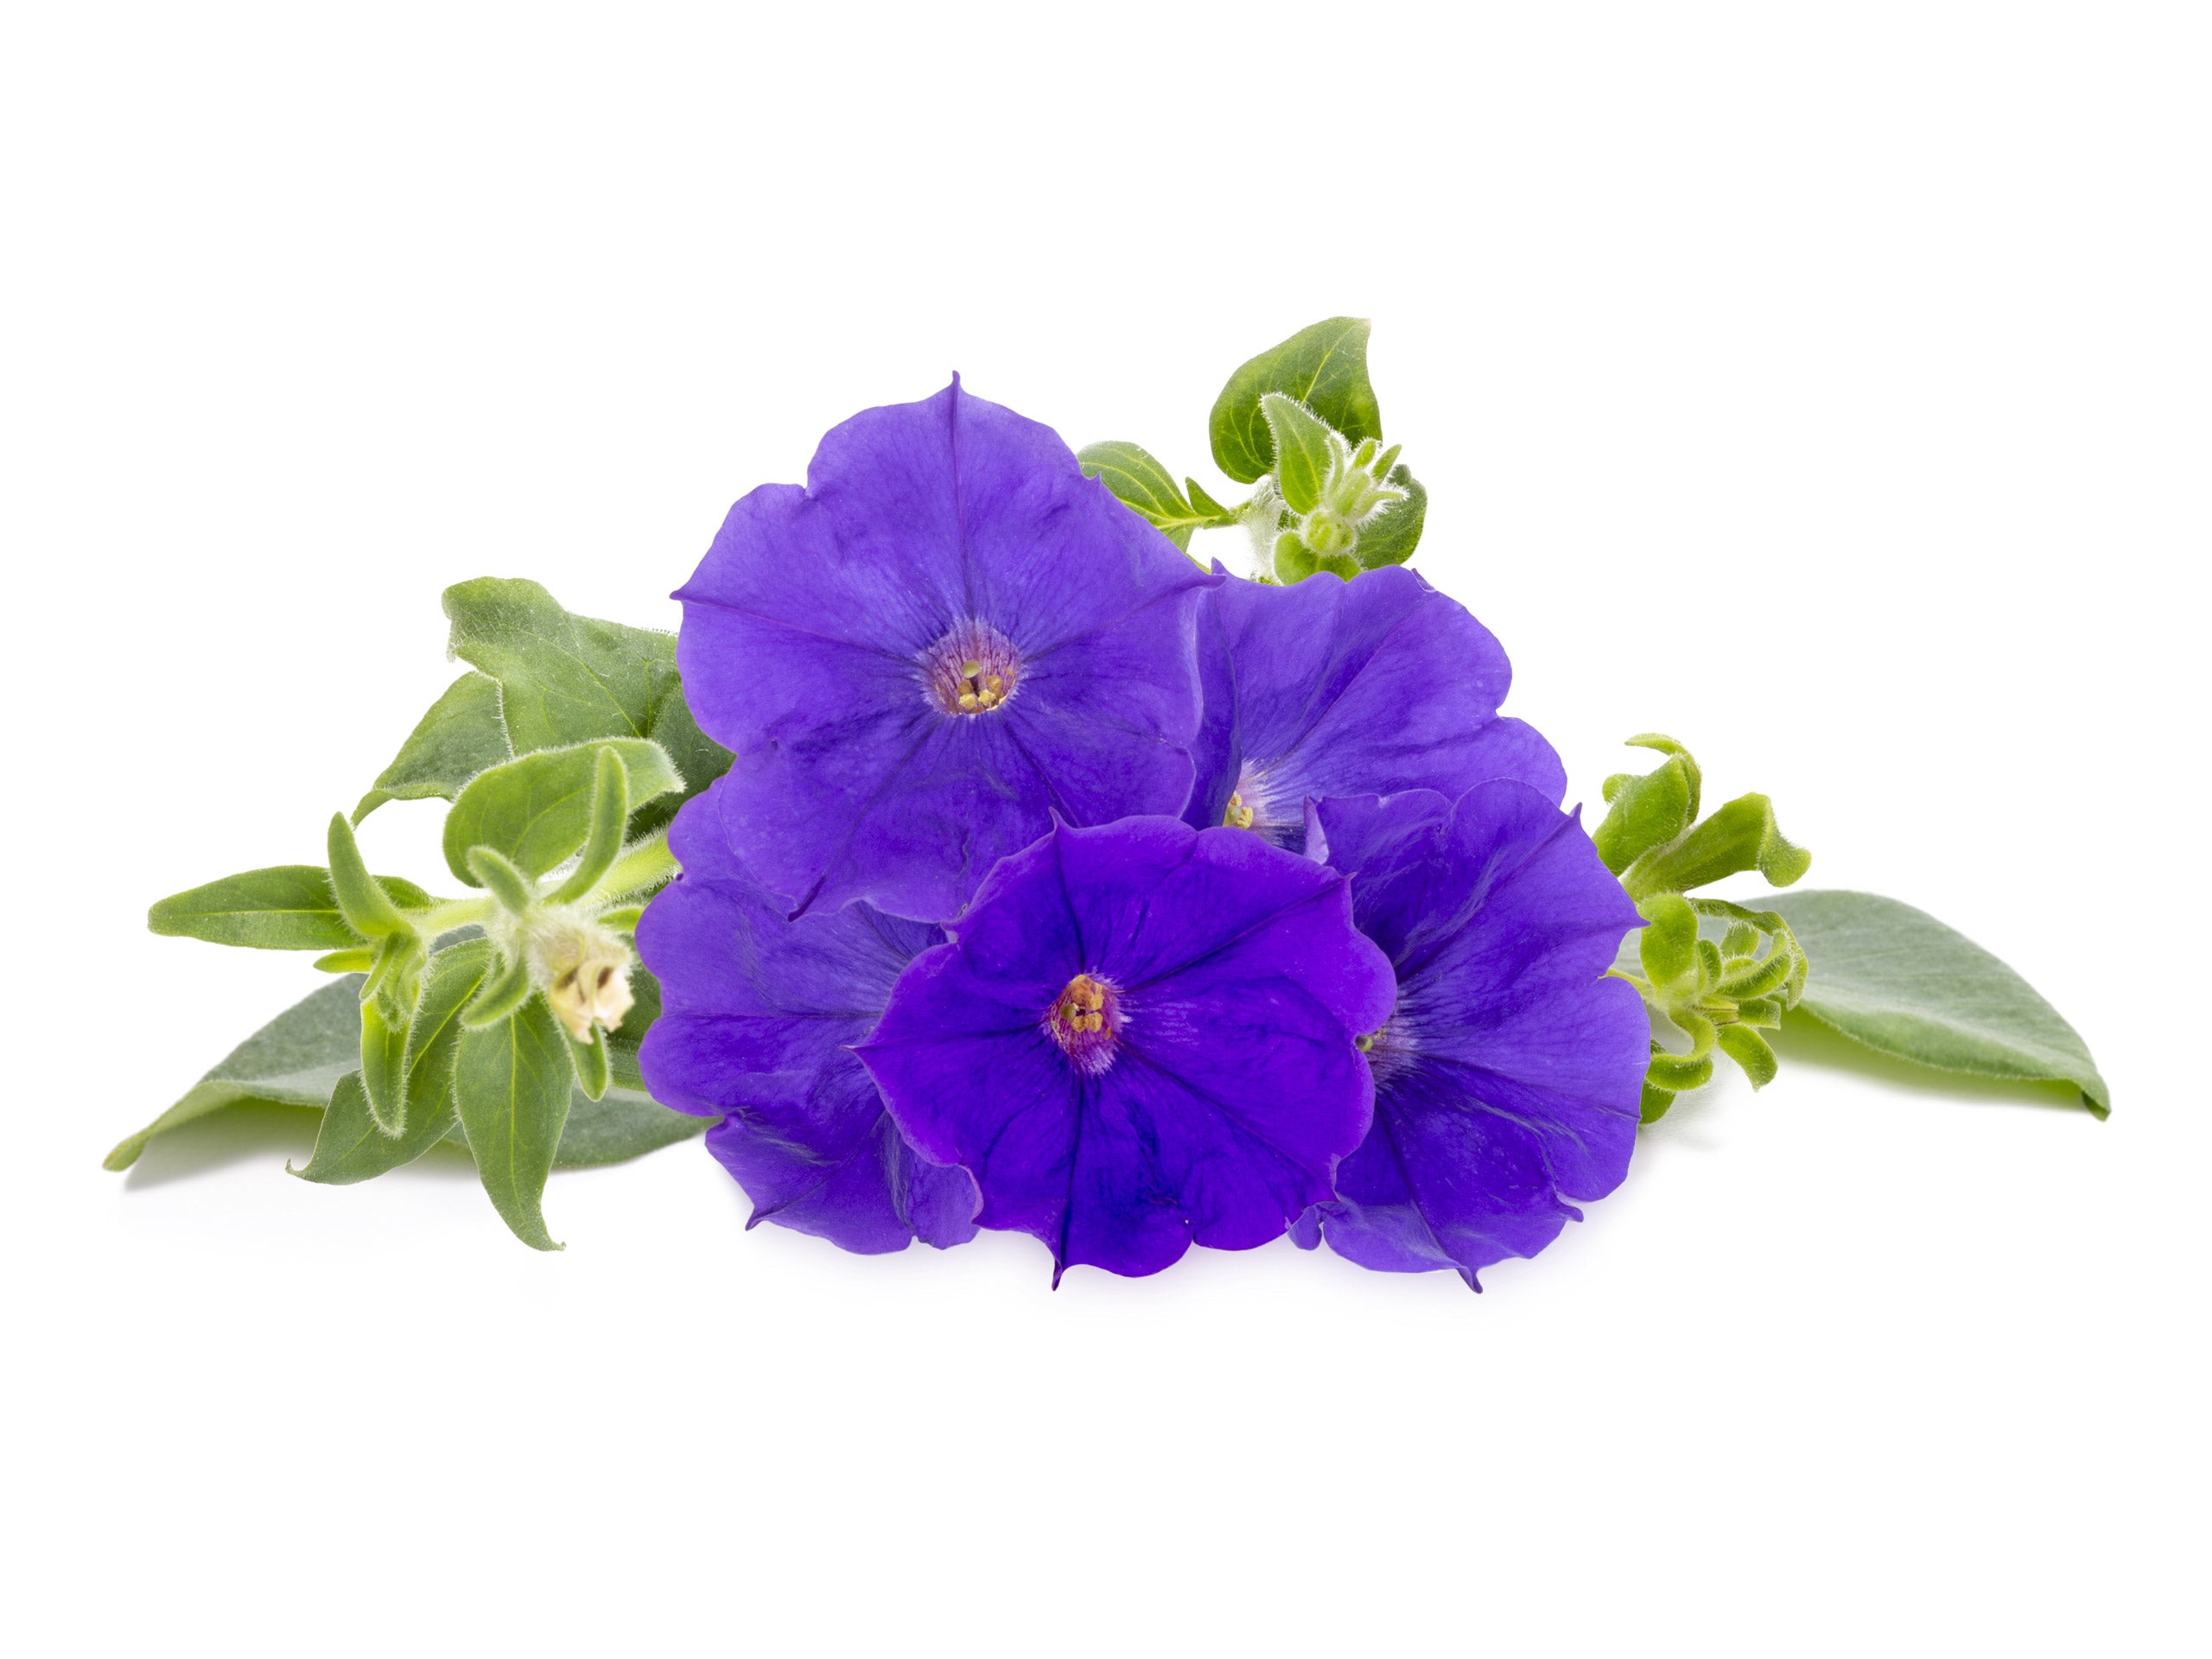
Blue Petunia
Petunia x hybrida multiflora
Related to tomatoes, tobacco, and chili peppers, petunias have the power to brighten up any space. The colour blue is actually rare among flowers! It is seen on only 10 percent of the 280,000 flowering plants on Earth. Moreover, there is actually no such thing as true blue pigments... but there are permutations of violet or purple.
Sprouts in: 1 - 2 weeks
Lasts up to: 12 weeks
- Petunia grows best at 18 - 30 °C / 64 - 86 °F.
- Petunia requires very little care, just remove withered flowers and leaves to enhance further flowering.
- Blue Petunias are somewhat taller and have larger flowers than our regular Petunia mix.
- The flowers of Blue Petunia appear approximately five weeks after planting and have a pleasant, sweet scent.
- Attention! Blue Petunia is not an edible flower.
-
Depending on care - plant pods may last up to four months.
Busy Lizzie
Impatiens Walleriana
Also known as Impatiens, Busy Lizzies are a riot of color. Known for their vivid red, fuchsia, orange, white, and pink flowers, Busy Lizzie is popular for its minimal maintenance needs and maximally pleasing appearance. The Growell indoor garden will fully take care of the growing process!
Sprouts within: 7-14 days
Lasts up to: 84 days
Temperatures: 18 - 24 °C / 64 - 75 °F
- Busy Lizzy is a heat-sensitive plant that germinates faster and produces more flowers if grown at 18 - 24 °C / 64 - 75 °F.
- If more than three seedlings start growing in one pod, you may thin it and leave up to three of the strongest ones to grow. By doing so the plant pods will last a bit longer than promised.
- Expect to see the first flowers approximately 50 days after planting.
- Busy Lizzy requires very little care, just remove withered flowers and leaves to enhance further flowering.
- Depending on how you take care of your Busy Lizzy pods last up to 90 days.
- In addition to its visual beauty, it is edible too. You may use the flowers to garnish your dishes or add to cold drinks.
- Busy Lizzie stem cuttings root easily in water or in Grow Anything Plant Pod- by doing so you can keep your favorite flower color alive forever.
Calendula
Calendula officinalis
With both decorative and healing properties, Calendula is a multi-faceted addition to your indoor garden.
Calendula is also known as Pot Marigold; an easy-to-grow, widely known edible flower with high pharmaceutical value. Its bright yellow-orange tones will brighten up any space. Calendula has a natural talent for bringing summer vibes indoors. That must be the reason it's loved all around the world!
Calendula's flower is edible. The whole plant is full of antioxidants; buds and petals are especially rich in triterpenes, flavonoids, polyphenols and carotenoids. They add color to fresh salads and other cold dishes, including ice cubes. Calendula tea brewed from dried buds and petals is a natural remedy for anxiety and stress.
Sprouts within: 7-14 days
Lasts up to: 84 days
Temperatures: 18 - 30 °C / 64 - 86 °F
- Calendula is not heat sensitive and grows best at 18 - 30 °C / 64 - 86 °F.
- You may thin out extra seedlings and leave one or two of the strongest per pod to thrive. This way the whole plant pod will last and provide blooms for a longer time.
- Expect to see the first flowers approximately 50 days after planting.
- In order to keep it in flower it is crucial to remove withering flowers with a piece of stem - this is called deadheading. New flower buds will emerge soon and will continue to do so until it reaches 12 weeks of age. If you keep taking good care of it - it may last even longer.
- Use edible flowers in full bloom for a soothing tea or garnish - harvesting flowers also promotes new buds to develop. They have a slightly bitter, tangy, peppery flavor. They add color to fresh salads and other cold dishes, including ice cubes or desserts.
- If you wish to plant it out trim it back and release root-bound. Just keep in mind Calendula is an annual and will not re-flower if the temperature drops to freezing.
- Calendula is generally safe to use as a mild remedy, also for kids. Though, people who are sensitive to the Asteraceae/Compositae plant family should avoid it. Avoid ingesting Calendula for its pharmaceutical properties if you are pregnant or breastfeeding, just in case.

Catnip
Nepeta cataria
Fresh homegrown Catnip is plant numero uno in cats’ books. Though a relaxing herbal remedy for humans, it gives felines a wild boost of energy.
Native to Europe, the Middle East, and parts of Asia, catnip’s unusual flowers and useful leaves will be a big win for your indoor garden.
Ask most cats and they will tell you that fresh, homegrown catnip is a great choice of plant. It gives felines a wild boost of energy but serves as a herbal remedy for humans. But did you know that some cats don't like catnip, it's just the way it is. Also, it has more effect as the plant matures. About one-third of cats are not attracted to catnip.
Sprouts within: 7-14 days
Harvest in: 35 - 84 days
Temperatures: 18 - 30 °C / 64 - 86 °F
- Grows best in temperatures between 18 - 30 °C / 64 - 86 °F.
- There is no limit to the number of seedlings per pod. Just let it thrive!
-
Catnip requires very little care. In about one month after planting, the plant is large enough for its first harvesting.
-
Gently trim off the tips of the plant leaving at least two pairs of true leaves to grow. There will be more growth soon!
- Catnip is great for drying and this way you can save it for later. Just lay the leaves on a paper towel sheet to dry and then store in a jar.
-
If you want your Catnip to bloom - don't cut it! But feel free to cut it back after flowering, new green growth will appear soon.
-
The plant will flower in about 70 days after planting and this annual plant is ready to be replaced after that.
- Nepetalactone, a component found in Catnip, is a mosquito and fly repellent.
- Catnip can help reduce chronic anxiety and boost the immune system.
Chili Pepper
Capsicum annuum
If you love spicy food, you’ll love growing chili peppers. They give the body a natural high and increase libido in both sexes. They prefer sunny spots and take a little time to fully ripen, but their delicious harvest is well worth the wait. Prepare yourself for a spicy liftoff! It takes some patience and effort to grow chili pods by yourself. This exciting journey will take you through all the crucial gardening jobs for thriving growth. No worries if you don't know how - we're here to support you every step of the way.
Chili fruits have a heat level of up to 20,000 on the Scoville scale.
Sprouts within: 7-21 days
Harvest in: 98 - 126 days
Temperatures: 20 - 35 °C / 68 - 95 °F
-
Chilies are a bit slow to germinate, so it might take a while - up to 3 weeks. You can speed up the process by raising the temperature to 26 °C / 79 °F. Overall, chili pepper is a very heat tolerant plant, it grows best as from 20 °C up to 30 °C.
-
Decrease the number of chili plants to one per pod to ensure enough space for the plant to grow. You can find more information and a video about thinning here.
-
Do not cut or prune your chili plant. It will form flowers at the tip of the plant.
-
Once your chili is flowering, the blossoms need to be pollinated. To help blossoms pollinate, gently shake your plant or use a clean paint brush to move pollen from one blossom to the next. You can also pollinate with your fingertip. A guide to pollination may be found here.
-
Chilies need some time to ripen, up to 90 to 120 days from planting the pods. Caring for the plant during this time consists of cleaning the plant from wilted leaves and dead flowers as not every flower becomes a fruit. The plant has the skill to use its resources in the best imaginable way.
- Chili pepper fruits ripen from white/purple to bright red color in about 12 weeks from planting.
-
Once the fruits have ripened, the plant will slowly start to degrade. The chili pod has fulfilled its purpose to produce little peppers.
-
If you feel a true affection to your chili plant after harvesting its fruits, feel free to prune it and repot your plant to a bigger pot with some fresh soil and create your very own chili bonsai - a great opportunity to start a new hobby!
-
Please note! The leaves and seeds of the chili can be hot. It's always a good precaution to wash your hands after touching the chili plant. It’s also not a wise decision to scratch your eye or other gentle body parts after dealing with chili plants.
- Warning! Only the fruits of the chili are edible, the rest of the plant is poisonous and should not be consumed.